
How to Turn a Photo into a Perler Bead Pattern with AI
Turn your photo into cartoon, chibi, flat or pixel artwork with AI, then convert it into an editable Perler bead pattern with color counts and printable exports.
To turn a photo into a Perler bead pattern with AI, upload your photo, choose an illustration style and generate a new version of your subject. Then turn that artwork into a bead grid, refine the colors and export the pattern. BeadColor connects these steps so you can take a favorite face, pet or memory from photo to a design you can make.
The creative step comes first: AI can reimagine fur, clothing and other photographic details as illustrated shapes. You choose the look, review the result and decide which version to take into the pattern editor.
See the journey: photo → AI artwork → bead pattern
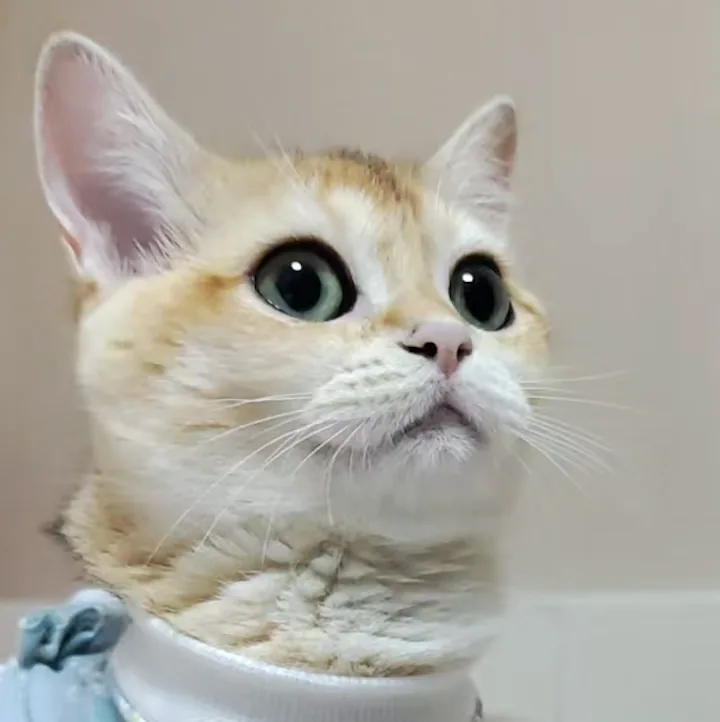
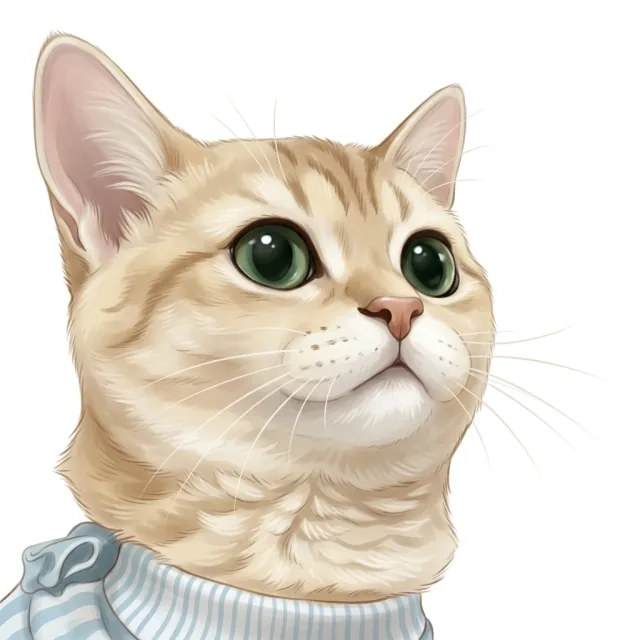
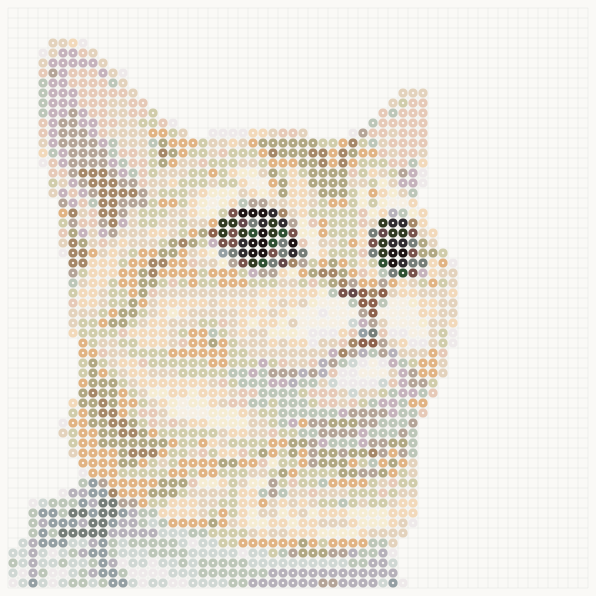
This example uses an AI illustration generated from the kitten photo on October 24, 2026, followed by an algorithm-converted bead grid. It shows the digital workflow; it has not been assembled or ironed with physical beads. Your generated artwork and pattern will vary with your photo, style and editor settings.
1. Upload a photo with a recognizable subject
Open the AI pattern generator and upload a PNG, JPG or WebP. A clear photo of one person or pet is a useful starting point. Make sure the features you care about—eyes, markings, hairstyle or expression—are visible and in focus. Use a photo you own or have permission to transform.
AI can simplify a busy photograph, but it still needs a clear subject to work from. Crop closer if the person or pet is a tiny part of the frame. Keep distinctive ears, hair and accessories inside the crop.
You can also start from an idea: switch to the description option and describe the subject you want to create. A photo gives AI a visual reference; a description gives it a new scene or character to interpret.
2. Choose the AI style that suits your idea
The style changes how your subject is illustrated before it becomes a pattern. BeadColor offers four starting points:
- Cute cartoon: expressive illustrated features and soft, clear shapes. Try it for a pet portrait where the face is the main attraction.
- Chibi: rounder proportions and simplified details, with the source photo guiding the likeness and framing. Try it for a small character portrait.
- Flat illustration: broad areas of solid color with fewer tiny details. Try it when you want clear shapes and an easy-to-read silhouette.
- Retro pixel: stepped outlines and deliberate square pixels with a game-art feel. Try it for a sprite-like interpretation of your subject.
Choose the look you want to keep in the finished piece. Flat illustration may give you simpler color areas, while cartoon or chibi can put more emphasis on expression. Pixel artwork still needs to be converted into a counted bead grid before making it.
If you add a written instruction, keep it specific. For a pet portrait, you might write: “Keep the green eyes and the orange patch above the left eye.” Instructions guide the result, but you should still check that those features survived generation.
3. Generate the artwork and check the likeness
Continue with your selected photo and style, then generate the illustration. Uploading and choosing a style do not themselves use AI credits. Review the generation allowance shown in the app before starting.
Compare the result with your original photo. Check the expression, eye color, face shape and distinctive markings. The goal is artwork you recognize and want to make. If a defining detail changed, adjust your instruction or try a different style before moving to the grid.
AI creates the source illustration at this stage. Color matching, bead counts and the printable grid come from the pattern conversion that follows. Approving the illustration first gives you a better starting point for those steps.
4. Turn your favorite result into an editable pattern
Send the generated image to the pattern editor. The converter maps the artwork onto a grid where each occupied square represents one bead. Choose your color library and simplify the palette until the subject reads clearly with the colors you have.
Zoom in on the eyes, nose and outer silhouette. Use drawing and erasing tools to refine individual cells, fill connected areas or replace similar colors. Check the overall view after each change: a detail that looks attractive up close may disappear when you see the whole pattern.
The built-in MARD 221 reference library is not an official Perler palette. If you make the project with Perler or another brand, check the actual beads against your selected references. Use the color chart library and MARD 221 chart to understand the color codes. Screen swatches cannot guarantee a physical match.
5. Export your design and bead list
Once the grid looks right, download a PNG for viewing, a PDF for printing and a CSV bead list for preparing your colors. Recheck quantities after your final edits so the list matches the version you will make.
Open the exported pattern before starting. Check that labels are readable and that you have the required bead colors. For an actual-size PDF, use 100% or Actual Size in your print dialog and check the printed spacing against your own board.
The app shows the allowances that apply to your generation and exports. See current plans and limits when you are ready to download your own project.
Common questions
Can AI keep my pet recognizable?
The photo and style instructions guide the illustration toward your pet's likeness. Review the result for defining markings, expression and eye shape before converting it. AI can change details, so a generated portrait always needs your judgment.
Which style should I try first?
Start with cute cartoon for an expressive portrait, or flat illustration for broad, simple color areas. Chibi gives a rounder character treatment, and retro pixel gives a game-art look. Pick the version that represents your subject best, then refine it in the editor.
Can I make a pattern without a photo?
Yes. Start with a written idea in the AI generator, choose a style and generate artwork to use as your pattern source. Describe one clear subject and the details that matter most.
Can I convert a photo without AI styling?
Yes. The image converter can turn an existing photo or illustration directly into a grid. Use the AI workflow when you want a new illustrated interpretation of the subject before converting it.